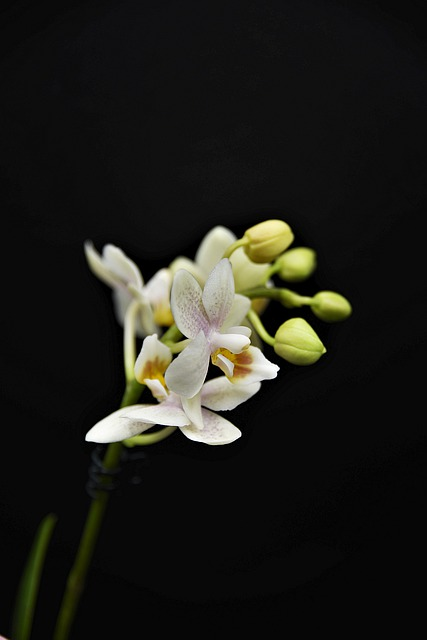
Orchids are beautiful and peculiar plants that need specific care. Cultivating these plants is not a simple task, especially if you are a first-time grower. So, it is not uncommon to make some missteps that might make your orchid unhealthy and withering. In this article, you’ll learn how to save a dying orchid.

If that happens — do not panic. There is still a chance to save a dying orchid and help it bloom throughout the season. Here are the steps to do so:
- Detect the issue
- Remove the orchid plant from the pot
- Take care of unhealthy parts of the plant
- Place the orchid in a new pot
- Let your plant recover
Though it might seem like a simple process, you will have to carry it out carefully. In the following lines, you will find a detailed explanation for each of these steps.
How to Save a Dying Orchid
1. Dying Orchid Inspection — Detect the Issue

Photo Credit Before taking any action, you should inspect the orchid and determine the cause of its poor health and approaching death.
First, take a look at the leaves. Are they wrinkly? Do they have some sort of spots or stains? Are any of them changing colors? These could be either overwatering, high light, or chemical exposure.
Orchid leaves can also turn yellow as a part of the natural aging process of the plant. Some orchid species will shed their old foliage every two or three years.
Check out the stem. Is it fresh and green, or is it changing color? Is it dry and shriveled? That can state a fungal infection, but it can also signify that the orchid is in its dormant phase.
To determine the exact cause, you should pay attention to whether the flowering season is over or not. If the plant has finished blooming and the flowers have fallen off, the orchid is entering a period of rest.
If you have a see-through pot, examine the roots. That part of the plant will help you understand why your plant is dying and whether it needs repotting.

RELATED: What do Nineteen Must-Have Meaningful Colored Orchids Mean in your Life
Common Causes of Death
Any more experienced orchid grower will tell you several common ways to “kill the plant.” These are:
- Overwatering
- Underwatering
- Poor or inadequate aeration
- High light exposure
- Overfertilizing
- Using pesticides improperly
- Purchasing an unhealthy plant
Overwatering
Overwatering has been the number one cause of death for numerous plants, and orchids are at the top of that list. The natural habitat for most orchid species is a tropical forest, where humidity is pretty high. So, they do not tolerate being drenched in water.
Watering this plant too much and too often will most likely cause the root rot. That will prevent the plant from getting the nutrients it needs, making it wither and die.
Here you should also be careful not to leave orchid foliage wet during the night. That is an invitation to crown rot and multiple diseases, which is why the morning is the best time to water the plant.

Underwatering
Even though orchids do not appreciate frequent watering, you should not leave them without water for too long. Underwatering will cause dehydration of orchid roots, severely damaging the plant and cutting off its food supply again.
It is essential to pay attention to the potting mix as well. New mediums usually dry out faster than the old ones. So whenever you are repotting, make sure to pre-moisten the mixture before adding it to the container.
Poor or Inadequate Aeration
Orchids need a continual circulation of air. Otherwise, they become prone to catching bacterial and fungal infections. Proper aeration helps evaporate moisture on the leaves. Additionally, it provides the conditions that allow your plant to thrive.
Because of that, you should check out whether your plant sits in a room with ventilation or someplace where it is easy to make a draft when necessary.
High Light Exposure

The heath and direct sunlight are also common orchid killers. After hearing that the plant is coming from a tropical climate, some first-time growers might presume it needs a lot of warmth and light. That is not the case with orchids.
Too much light can make leaves turn yellow and severely damage the plant. In case you notice sunburns or some spots on the foliage, consider moving your plant.
Most orchid species prefer filtered light, so it’s best to keep them in a shadowy area. Still, avoid keeping plants in places where they will not get enough sunlight to produce chlorophyll.
Overfertilizing
Another action that can lead your orchid plant to its doom is giving it too much fertilizer. Even though the right dosage may help your plant, you should be careful about overfertilizing.
Fertilizers are concentrated salts, and in larger doses, they can dehydrate orchid roots. If that happens, you will see the tips of the plant’s leaves turning black or brown.
Using pesticides improperly
Pesticides protect your plant against insects and various disease carriers. Yet going over the top with these chemicals may kill your orchid faster than any pest, bacteria, or virus.
So, when applying any pesticides, make sure to use the right amount, and avoid doing that during summer, when the air temperature is high.
Purchasing the Unhealthy Orchid Plant
Whenever buying an orchid, you should take a good look at it before paying, especially if you are growing multiple plants. Look for any signs of disease, such as spots or discoloration on the leaves, stems, or flowers.
If you fail to detect these, there is a good chance you will have to revive not one but all your orchids.
2. Pot Removal — Get Rid of the Old Medium

Repotting is a good idea if you notice something wrong with your orchid, especially with its roots. To make that process easier, you should grow your orchid in a transparent pot.
Bear in mind that the orchid will need a new pot when roots begin poking out the bottom of the container. Start by removing the pot gently. Then, carefully squeeze the bottom part of the container to help the roots and the mixture get out of it.
Orchid roots can wrap themselves around a medium with moss, mulch, soil, bark, and chips. If that happens to your plant, you should be extra careful while removing the mixture.
Try loosening the roots with your hands, and then use a gentle brush to clean them a bit. After separating them from the mixture, wash off the rest of the dirt and debris from the roots.
RELATED: How Stunning Dyeing Orchids Blue is Possible with Hassle Free Fun Ways
3. Plant Care — Tend the Unhealthy Parts

Once you have cleaned up the roots from the medium, it will be easier to see the parts you should remove. These would be any shriveled, black, brown, and dead or soft roots. You should not spare any of the crunchy bits or those that feel hollow.
It might seem to you there is still hope for some of them, yet if this part of your orchid is changing color — it will not get better. Thus, the best you can do is to cut those roots off.
You will need a sharp razor blade or shears and rubbing alcohol to do that. Next, sanitize your cutting tool and start removing dead or dying roots while paying attention not to damage healthy parts.
Still, you should pay close attention to the yellow roots. If they are mushy and soft, they are ready for removal. On the other hand, if these are the roots in the middle of the pot that usually don’t receive enough light, and their color is a pale yellow shade, you should not cut them off.
Some growers also wonder whether they should remove the stem and leaves that seem unhealthy. However, when it comes to foliage, you should only remove them in case of fungal or bacterial disease.
If you notice signs of the stem rot near the roots, you will have to cut it off. These parts will be brown and squishy, so you will be able to recognize them easily. You should cut it below the leaves, but make sure you leave the parts where it seems like the new roots are coming out.

In case your plant has some dried flower spikes, remove those as well. After that, many growers recommend spraying the plant with hydrogen peroxide to kill any fungus or pests. Others say that rubbing alcohol is a better option.
To get rid of the pests, some even recommend insecticidal soaps. However, you should not be using these chemicals casually on a dying plant.
4. New Pot — Use a Clear Container

After you take care of all the sick parts of your plant, it is time to put it back in a pot. You should always use a new and clean container. That is especially important if your orchid has been suffering from pest infestation, as some insects may use the potting media to reproduce.
Use a transparent plastic container to follow up on the recovery and any potential changes. It should have from 4 to 12 holes on the bottom for proper drainage.
Also, a pot with some holes on the side is a good idea to provide roots with needed aeration. Though pots and containers are specially made for that purpose, you can make one yourself with a sharp razor blade.
Avoid keeping your orchid in a ceramic pot because they are not doing much good, aside from complimenting the plant and your growing space. However, if you prefer it, you should use one that is a bit larger than your plant needs and place the orchid in it together with a plastic container. Still, you will have to remove a larger container each time you water the plant.
While changing the pot, you should also replace the potting medium. Then, before placing the plant, you should fill the container two-thirds or a bit more with the mixture.
Put an orchid on top of it, and try to lead the roots against the inside wall of the container, so each of them has enough light. Once everything is firmly pressed and tight and the plant stands upright, you can add some more bark and chips on top of the roots.
The Right Orchid Medium

Another decision you need to make before the plant repotting is what kind of medium would be the best for your plant. The ideal orchid mixture should have the following characteristics:
- Slow to decompose
- Great moist retainer
- Fast to drain
- Good circulation provider
You will have plenty of choices in a flower shop, but you can also make one on your own. You will need fir bark, some three ferns, moss, charcoal perlite, pine chips, or even coconut husk chunks or fiber.
To make a firm medium, orchid experts recommend using lava rocks, gravel, and pebbles. It is crucial to avoid mixtures that are too compact and ensure your plant gets enough air and moisture. You can also use styrofoam peanuts to place on the bottom of the pot, as it provides good aeration, while retainers like sphagnum moss and charcoal will ensure enough dampness for the roots.
RELATED: Why Do Orchid Leaves Turn Yellow — Step by Step Guide
5. Orchid Recovery

Once your orchid is all settled in a new pot filled with new media, the only thing left is to let it recover. It would be best to put it somewhere warm, where it will receive enough light without direct exposure. Still, the temperature of the orchid’s growing place shouldn’t go over 80℉ (27℃).
Water the orchid once every seven days during spring and summer and every 14 days over the autumn and winter. You can also spray leaves with water occasionally to ensure they have enough moisture.
If you use fertilizer, apply it once a month and only after watering the plant. Avoid using pesticides, along with other protective chemicals, during high temperatures. If you use too much fertilizer, pesticides, or herbicides, the best option is to repot the plant and replace its mixture.
Make sure that your orchid has good care, and it may come back to life within a couple of months. If it had suffered severe damage, it would probably need more time. In that case, the recovery might take even a year or two, but don’t let that discourage you.
Another Effective Method Of Saving Dying Orchid
Frequently Asked Questions
What is the difference between an orchid spike and a root?
The most apparent difference between orchid flower spikes and roots is the mitten-shaped tip of the spikes. Roots can have a light green, and with some species, reddish color and usually emerge at the bottom of the stem. Spikes are greener and appear between the leaves of the plant.
Why are the leaves on my orchid wrinkled?
Orchid leaves becoming wrinkly may be a sign of overwatering or underwatering. It can also signalize some imbalance of humidity levels. Before you determine the cause, inspect your growing area. For example, you might be watering correctly, yet the surrounding is too dry, or on the contrary, the humidity is too high. Sometimes it can also happen if you haven’t changed the potting medium for a while. Old medium retains more water. In that case, wrinkly leaves indicate that it is time for repotting.
How to tell if the orchid needs repotting?
The sign that it is time for repotting is noticing the orchid roots poking the bottom of the container. You should also do this if the roots are tangled too tight. Repotting is necessary if you haven’t changed the potting medium for two years. And another reason is if you notice the orchid roots are changing color to yellow and brown. Roots tangling tight leave a little or no space for air circulation, while turning soft and brown or yellow is a tell-tell sign they are rotting. The older mixture will keep more water, making your orchid vulnerable to various diseases. While repotting, make sure to remove all the sick parts of the plant, so you can enable it to soak in the nutrients it needs from the fresh mixture.
Is it good to water an orchid with ice?
Studies show that watering orchids with three ice cubes can replace the amount of water an orchid needs in a week. However, you should ensure the ice doesn’t directly contact the roots or leaves.
Still, if you would instead use tap water, there is a simple way to do so. Place your orchid for about 15 seconds under lukewarm water in a kitchen sink and leave it to dry afterward.
My orchid doesn’t bloom. Why?
If your orchid is not re-flowering, it might need more light. You can determine that by looking at the foliage. If your orchid has dark green leaves, the plant is not getting enough sunlight. Try placing your orchid next to a window. Once the foliage starts getting lighter, olive green color, you will know that the orchid in the right surrounding. With proper cultivation, it will bloom pretty soon after that.
Editor’s Recommendations
50 Types of Orchid Flowers You Need to See (Including Pictures)
20 Gorgeous Orchid Plants (Including Pictures)
12 Different Types Of Vanilla Plants (Including Photos)

The majority of people who have no interest in the subject, and aren’t green fingered assume that all plants and vegetables require the same growing conditions. This is not the case at all. Each plant has its own unique and interesting history and growing process.
I hope you will find The Natural List useful, and that it will help educate you on the wide variety of different flower and plant species there are across the globe.
- Top 10 Online Places You Can Trust To Buy Indoor/Outdoor Plants - July 2, 2023
- How To Use Plant Watering Globes Correctly? A Comprehensive Guide - July 2, 2023
- 25 Fantastic Gifts For Gardeners And Plant Lovers - July 2, 2023