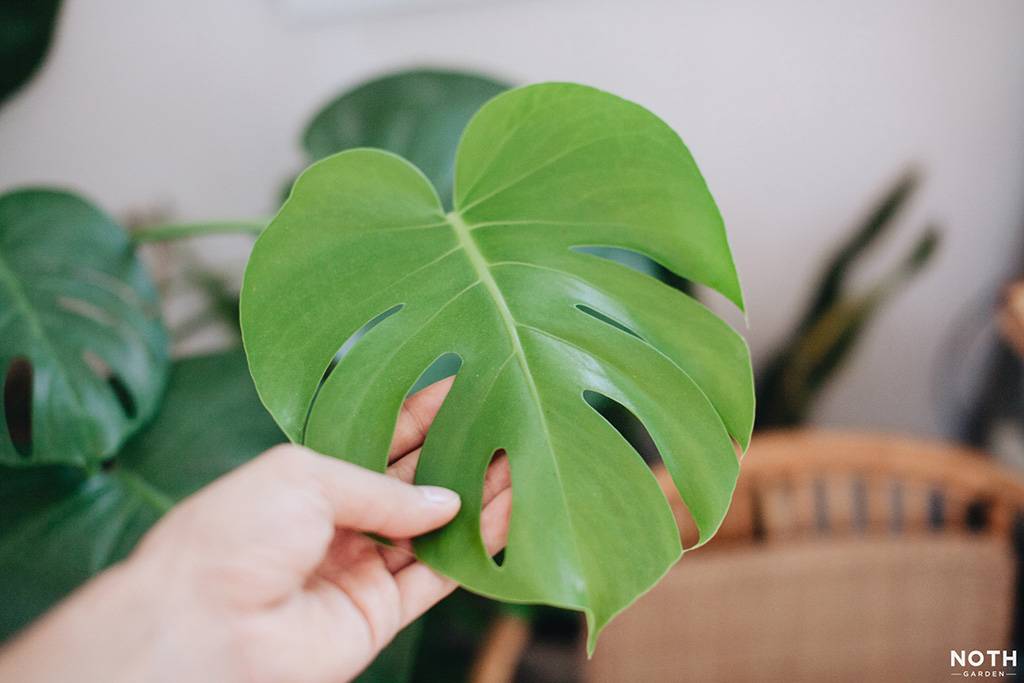
If you’ve already owned a Monstera or two, then you know that this plant is a stunning eye-catcher. With its large, verdant, pierced, and heart-shaped leaves, it immediately piques the interest of guests, to say the least. Some might have even asked you where you got your wonderful plant so that they can get one for themselves. In this article, let’s talk about the best ways for propagating Monstera.

You might be scared to cut up your Monstera deliciosa plant. Fret not, though, because it is worth it. Here, we’ll be covering how to take a cutting from the parent plant, how to ensure it has the best chance of thriving and growing, and finally, some advice and tips about making the process easier and enjoyable.
We’ll also answer some of the more common questions asked when it comes to propagating your Monstera plants.
In this article, we’ll be taking you on a deep dive into how to propagate your Swiss Cheese plant so that you can give a loved one or yourself plenty more of this amazing plant!
Where Do I Take A Cutting From My Monstera For Propagation?

In propagating, there are certain rules that you must follow in order to ensure successful plant reproduction. You cannot just cut a plant anywhere you like and hope that it will grow roots. There are specific plant parts that you must know first.
If there is one rule you should remember for taking a cutting from your Monstera is that your cutting must always have a node. Your Monstera simply won’t set itself up without a healthy node. To understand this better, a review of the anatomy of your Monstera might be helpful. But first, what do we mean by a node?
The nodes are those ridged sections that run around the Monstera stem from which the petiole, or the stalk that is holding up the leaves, is attached to. A good rule of thumb is that every node accommodates one petiole, and hence one Monstera leaf.
However, there is a possibility that you can have several more nodes if that node aborted a leaf or when a fresh stem grew out from the same spot.
Nodes are where your Monstera can grow new branches. Each node may have a structure called the axillary bud that looks like a round stump protruding from the node. This serves as a dormant leaf of some sort that grows when its current petiole gets cut.
The internodes are simply the spaces between nodes. This is precisely where you want to cut, as cutting in this area ensures that a node is included.
Sometimes, you might see aerial roots from the stem of your Monstera. They often sprout out as a pale white stub that breaks through the plant’s stem. They can grow into flexible brown roots and will sometimes develop a bark-like, papery covering. This is what they use to cling to trees or climb trellises and other supporting structures.
Take note that by the aerial roots themselves, they cannot give sustenance to plants and are still physiologically distinct from the plant’s true roots.
Now I Know My Monstera Anatomy And Where To Cut For My Cuttings, How Do I Begin The Propagation Process?

Knowing your basic plant parts is the first thing. The propagation process is where it all gets more exciting. The process consisted of four distinct stages, namely the unrooted cutting, rooted cutting, established cutting, and finally, the new plant.
Here is the propagation process as outlined:
1. Unrooted Cutting
This is the first stage of the propagating process. This is when you cut a piece of Monstera away from its mother plant. It won’t have any true or soil roots, but it can have several aerial roots.
In this stage, the plant is dying slowly unless it starts to grow its soil roots. At this point, the primary goal is to get your cutting to start growing roots as soon as it can so that it can be able to uptake water and continue to nourish itself.
2. Rooted Cutting
The plant cutting is only considered to be rooted once it has developed its own root system. This first begins as a single, thin, hairy root growing out from the stem, specifically on the site of the node that is beneath the growing medium.
This root will start absorbing water for your cutting and eventually start branching out, called feeder roots, in order to be able to support its maintenance and growth.
3. Established Cutting
The plant cutting is then ready to be transferred in its final growing medium when the feeder roots and the main roots grow into a couple of inches long. It is already established when the whole plant becomes adjusted to the new environment and starts growing.
4. New Plant
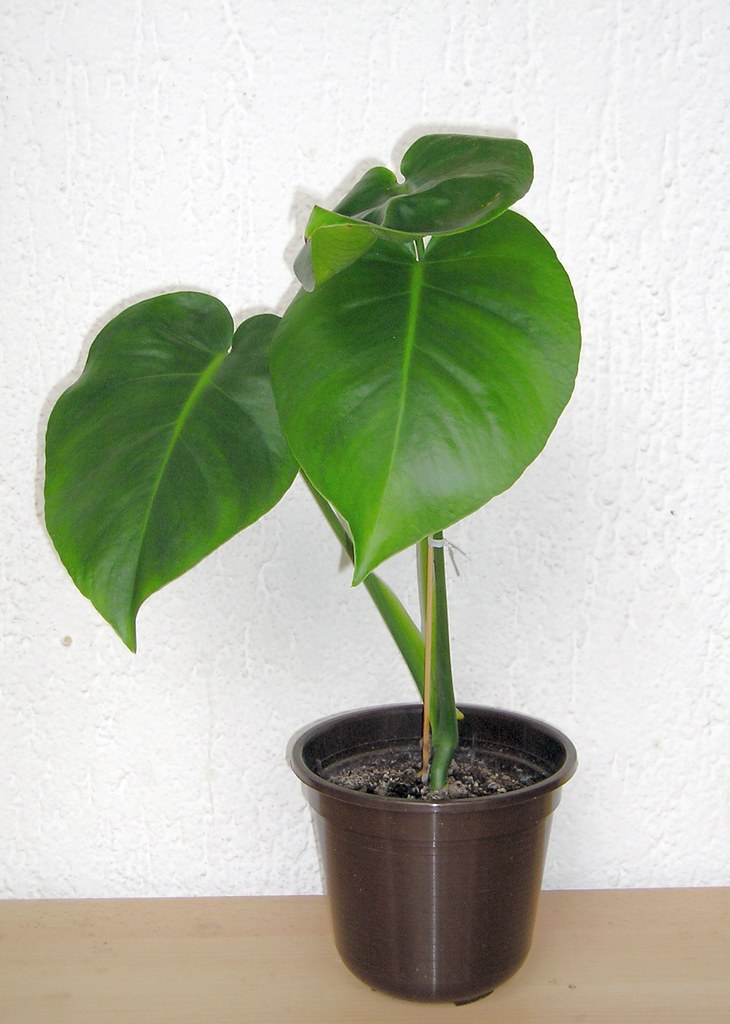
After being established, your Monstera will start producing new fronds and foliage. Sometimes, this happens even when your cutting is still being rooted, especially when it is already for a prolonged period of time.
Once your cutting starts developing new leaves, it means it is receiving a sufficient amount of water, sun, and nutrients. Therefore, it is considered a new and happily thriving plant.
Related: A Yellow Nightmare: 7 Reasons Why Your Monstera Plant Is Changing Color
Is There An Ideal Time To Propagate My Monstera?

In any houseplant journey, timing is everything. However, for the propagation of your Monstera plant, there is an exception to this rule.
There is no perfect season or time for you to propagate your plant. Therefore, you can propagate whenever you want. Just make sure that your plant is growing actively and is receiving adequate light, water, and nutrients.
If propagating in the winter season, you may need to augment lighting by using artificial lights for your mother plant and cutting to keep growing healthily. Worst case, your Mother plant and your cutting may grow sluggishly as compared to when it is spring or summer.
Are There Types Of Cutting That I Can Make?

Now that you know the basic plant anatomy, the propagation process, and the best time to do propagation, you must know that there are three different cuttings. The cuttings you can make when you propagate a Monstera plant are top, mid-cut, and stem. Below gives you more detailed information about these cuttings.
A top cutting of the plant is definitely the simplest way you can get a cutting from your mother Monstera. It only requires a single snip at the internode. By doing this, the cutting you get will contain the terminal bud, which is the growing point found at the top apex of the mother Monstera’s stem.
This terminal bud will contain a pointed bump from which new petioles of leaves arise. These are considered the best cuttings as they usually grow fast, and the leaves they have will retain maturity.
A mid-cutting is the cutting that you get when you continue to keep cutting in between the internodes after a top cutting has been acquired. Essentially, each mid-cutting has two snips: one below and one above.
From this cutting’s axillary nodes, it will grow new stems. However, this type of cutting starts over when it comes to its leaves and maturity.
A stem cutting is basically just a stem (as the name implies) that just contains nodes without leaves. You can still propagate Monstera deliciosa this way, but it will just take longer as photosynthesizing without leaves is a bit challenging for this cutting.
Should My Cutting Have A Certain Size For It To Be Viable?
The ideal cutting should contain two to three leaves with the same amount of nodes. A cutting that has more number of leaves is more able to produce energy when it starts regaining the capability to absorb water. This speeds the process of establishing itself and growing new leaves again.
Having more nodes also widens your margins for mistakes as sometimes, a node or two may rot. In addition, your cutting will start to look more like an established plant sooner. Finally, having some aerial root in your cutting will aid your cutting to grow roots faster.
This does not mean, however, that your cutting should contain more leaves and nodes. The trick here is being able to balance the cutting’s consumption and energy production.
Having too many nodes and leaves means that the plant is using more water and energy without having the means to do so as it does not develop any roots yet.
Related: The Monstera Is Loose! How To Save Your Droopy Plant
Does My Cutting Need To Have Aerial Roots?

Your cutting will not need aerial roots for it to survive rooting and establishing away from its mother Monstera. However, it does certainly help as it shortens the time it spends in its unrooted phase and thus reduces the problems that your plant may encounter, such as rot.
If a cutting does not develop any aerial roots, eventually, the new true roots will sprout from the stem.
Do take out aerial roots that are broken, mushy, or black, as this can serve as a focus for rot if you set them in the rooting medium. Any part of your cutting that also seems damaged should be cut off.
How Long Will It Take For My Monstera Cuttings To Establish Themselves?
This depends mainly on the cutting you have made, the current health of your mother Monstera and the cutting itself, and the propagation method. Generally, and if all these cuttings had aerial roots, a top cutting would take 1.5 months, a mid-cutting three months, and stem cuttings four months. –
What Is The Best Propagation Method For My Monstera Cutting?

You won’t run short of the myriad of methods to be able to propagate your cutting into a fresh, healthy plant. Each methodology will work, but it will have some upsides and downsides.
Our advice is to choose whatever method which you think will work the best for your current circumstances and situation, as not one propagation method is superior to the other. When you choose a propagation method, consider the rooting needs of the cutting AND to always avoid root rot wherever you can.
One general tip here is that you need to keep your cutting consistently moist as not only will this keep your plant kicking and alive, even without roots, but it will also encourage roots to grow.
Airflow is also important in high humidity as this will provide oxygen and prevent root rotting.
A simple way to prevent stem rot is to suspend your cutting just slightly above the medium. Maintain the cut portions as dry as they possibly can.
Finally, additional nutrients are not necessary because your cutting won’t be able to absorb them since it has no roots. So only apply fertilizer when you see clear signs of growth in your cutting.
1. Air Layering
This means coaxing aerial roots to grow and become soil roots before finally cutting them. This can be made by wrapping moss bundles around the healthy aerial roots, directing the aerial roots to grow on a moss pole, or putting the aerial roots in another container of water or soil.
This may be the best propagating method as it encourages soil root growth without having to cut the plant away from the mother Monstera. This essentially eliminates the unrooted stage of the cutting and hence giving the cutting its best chances of survival.
This method, however, does not really work well for the top cuttings that don’t have any aerial roots. This will also not work with existing rootless cutting or for reconditioning Monsteras that have no soil roots yet. This also isn’t the most aesthetically pleasing way of establishing a cutting.
2. Water Propagation
Perhaps the simplest propagation technique on this list. You can simply fill a container with water, and put your desired cutting in. Make sure to replace the water every couple of days or so to avoid contamination. To decrease the likelihood of stem rotting, only try to dip the aerial roots in the water and let the rest of the stem suspend outside.
This method allows for an unobstructed view of the stem and root system to monitor for rot. It also keeps consistent moisture and thus prevents dehydration. There is also no organic material that may be a nidus of disease. Finally, roots grow faster in this medium.
The downsides to this method include minimal airflow for roots, and the only oxygen source for the cutting are the ones dissolved in the water. It may also be sometimes hard to transition the plant’s roots from growing inside the water to growing in the soil.
3. Soil Propagation
Most nurseries opt for this method as it is the most efficient. There is no waiting for establishment in moss or water, just straight into the soil. In this list, this may have the most cons. But it still isn’t without its use.
There is no transplanting that is required here, and the plant immediately benefits from the additional nutrients and oxygen in the soil. However, it is hard to maintain moisture consistently, and you won’t be able to check for signs of root rot.
If overwatered, the soil mix can lose oxygen and become anaerobic. Finally, growing in soil introduces nidus of infection such as bacterial or fungal diseases.
4. Moss Propagation
In replacement of soil, you can use this method by putting your cutting in a sphagnum moss. Moss usually retains more humidity without actively watering the medium, while it still allows for airflow. It is also more easy to maintain the stem outside the medium, and the roots grown via this method have an easier time transitioning to the soil.
This method brings excellent results but may be challenging for a beginner to execute. Just like the soil, you won’t be able to check for root rot. It is also an organic medium that can introduce sources of infection. Finally, separating the plant from the moss can cause damage to the already established root system.
5. Perlite Propagation
This method is almost similar to water propagation with the added benefit of additional airflow. The organic material Perlite is porous and absorbent, which means it will direct moisture toward the aerial roots without bogging them down too much with excess water.
Fill the container only with a small amount of water just below the plant’s stem and partially cover the top in order to retain humidity around the plant roots. The downside of this is that you also won’t be able to see root rots without pulling the plant off from the container.
Now Comes The Time To Actually Cut My Monstera. How Do I Do So?
First and foremost, prepare your growing medium for your Monstera cutting. Any of the above choices will do as long as it first meets your needs.
Then, sterilize your cutting implement of choice by dipping it in rubbing alcohol or a mixture of 1 part bleach to 10 parts water. Finally, wipe your instrument clean and dry after.
Then, select the location of your desired cut. Always make sure to keep sufficient space on both sides of the node. As earlier mentioned, include an axillary bud, which is often located above the plant node. If possible, include aerial roots as well.
Once a cutting is made, you can optionally dip the cutting’s end in rooting hormone. This is naturally made by the plant, and this will signal your plant to start growing roots. However, including this additional step encourages roots to grow faster. Either powder or gel rooting hormones will work fine. Some of the commercially available rooting hormones will even have fungicides to prevent root rot.
Can I Propagate My Monstera From Seeds?

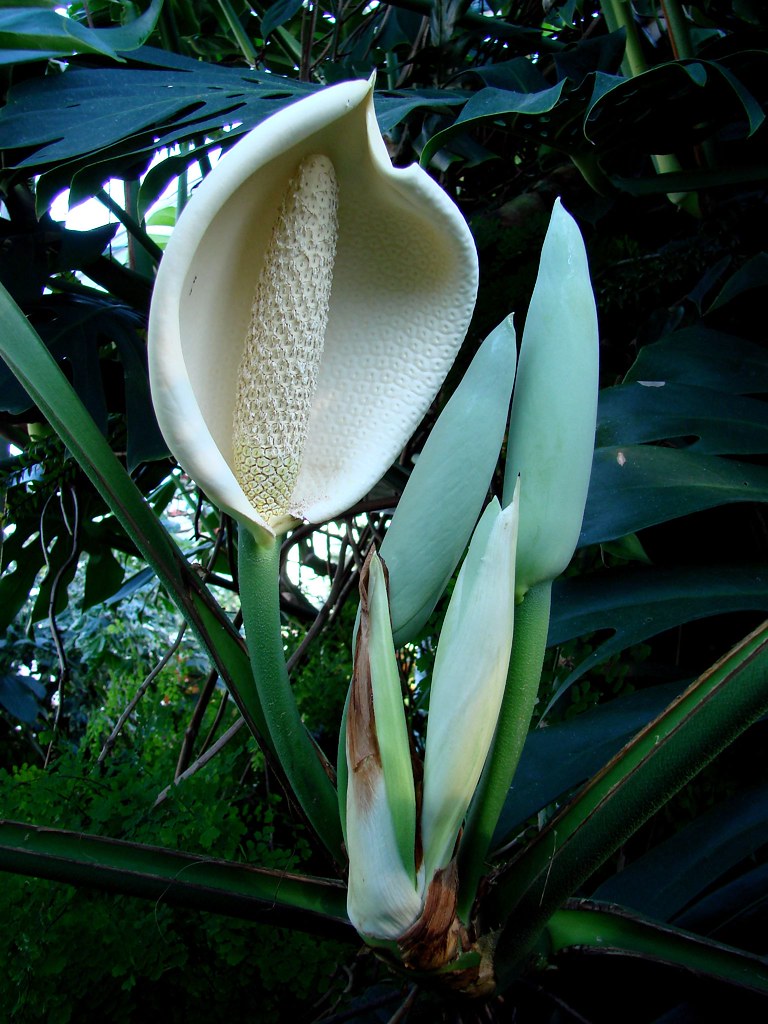
As bizarre as it may sound, Monsteras can actually grow from seeds as well! These seeds come from the equally rare and bizarre fruit of the Monstera. Many nurseries and online sellers carry Monstera seeds if you want to try this out.
However, it is important to note that it may take longer before your seeds start to sprout as Monsteras as compared to just propagating it from an already established Monstera plant.
Conclusion

As you may have seen, there are plenty of ways to multiply your Monstera deliciosa plant, and you don’t always have to be stuck with just one plant. Surprisingly, you can also propagate this plant by its fruits!
Regardless of what propagation technique you use, be sure to follow our tips and tricks, and you will be well on your way to producing this plant for others and, most especially, for yourself! The more, the merrier, right?
Editor’s Recommendations
36 Beautiful Aglaonema (Chinese Evergreen) Varieties You Must Have
Begonia Maculata Polka Dot: The Best Care, Propagation, and Watering Guide
20 Types of Calathea Plants that You Should Have in Your Garden

The majority of people who have no interest in the subject, and aren’t green fingered assume that all plants and vegetables require the same growing conditions. This is not the case at all. Each plant has its own unique and interesting history and growing process.
I hope you will find The Natural List useful, and that it will help educate you on the wide variety of different flower and plant species there are across the globe.
- Top 10 Online Places You Can Trust To Buy Indoor/Outdoor Plants - July 2, 2023
- How To Use Plant Watering Globes Correctly? A Comprehensive Guide - July 2, 2023
- 25 Fantastic Gifts For Gardeners And Plant Lovers - July 2, 2023