Pests, weeds, and plant illnesses can plague any garden, even those tended by experienced gardeners. These issues can arise out of nowhere, leaving behind nothing but stress and sadness as plants perish and gardens fail. Don’t worry, though! Preventing them is easy if you know what to do. For instance, having your soil sterilized is one way to protect your plants from pests and diseases lurking in the soil.

Sterilizing your soil before planting can keep fungi and diseases away from your plants.
RELATED: Will Grass Seed Grow If Not Covered With Soil? Sowing Seeds For A Perfect Lawn
It is typically a good idea to sterilize garden soil before planting or seeding to guarantee the ideal growth and health of your plants. This is because garden, potting, and seeding soil can harbor seeds of weeds, diseases, and pests. While you can always go out and purchase sterile potting mixes, you do not need to! Instead, one can quickly educate himself on how to sterilize a garden, potting or seeding soil at home quickly, effectively, and cheaply.
Soil can be sterilized and protected from plant diseases, fungi, and pests in a number of different methods. However, chemicals or heat are often used. The quantity of soil you need to sterilize will dictate the strategy you use to sterilize your soil. Pests and weeds can be eliminated, for instance, by spraying commercial insecticides and herbicides on your soil. Alternatively, you can sterilize your garden, potting and seeding soil with boiling water or by placing it in a hot oven.
Sounds cool? Read on! We will tell you everything this is to know about sterilizing the soil.
What Is Soil Sterilization?
Sterilization is any method that eliminates, destroys, or inactivates all traces of life or other biological agents.

If you love gardening, you’ll eventually want to sow seeds and new plants in the soil. The issue is that the soil doesn’t always have the right characteristics for planting.
It may harbor various pests and diseases that will stunt your plant’s development or even kill it altogether. If you use the same potting mix or garden soil year after year in your garden, you may end up with a number of hazardous pathogens, weed seeds, fungal spores, and other types of garden pests that can cause damage or kill your plants.
RELATED: Common Lawn Pests & How To Get Rid Of Them | The Ultimate Guide
Sterilizing the soil can help you kill these weed seeds, fungal spores, dangerous pathogens, and other pests such as ticks, mites, and gnats that live in the soil.
Farmers sterilize their fields when they have difficulties with pests or diseases in high-dollar crops, and greenhouses sterilize their soil so that they do not need to replace their potting soil every year. This saves both time and money.
The cost of sterilization is significantly lower than fixing problems or the possibility of losing an entire crop. Soil sterilization is not really important when growing mature plants (although still beneficial). However, it is absolutely critical when the soil is being used for seeding plants, transplanting juvenile plants, or propagating stem and root cuttings.
Why Sterilize Garden Soil?
Soil sterilization creates a safe growing environment for seedlings, seeds, and fragile plants.

Countless organisms call soil home. Sadly, not all of that life will be what you want to see thriving in your garden beds. There are times when the soil you’re working with is loaded with nematodes, fungi, insects, and weed seeds. These unwanted guests pose a threat to the plants that you have labored so hard to grow. If you were to take a handful of dirt from your backyard, for example, you would probably find it to be full of the following:
Pathogens
The average garden soil is home to tens of thousands of different species of bacteria and viruses. Unfortunately, a good number of these can be harmful to your plant as it grows.
Until they are eradicated, they can survive in the soil for a considerable amount of time and may even be passed from one plant to another.
Fungus
Have you ever considered why potting soil sold in stores is packaged in bags with holes in them for air circulation? This is because in humid and wet conditions, many molds and fungi can easily grow in soil, and some of them can cause harm to your plants.
Weeds
When you plant a new seed, the last thing you want is for weeds to grow beside it and consume all the nutrients. And it is not uncommon for one to find weed seeds in the soil.
Plant Pests
These common little insects like to conceal themselves in the soil, where they can cause a variety of issues. They are so common, in fact, that it is highly possible that you will even find them in newly purchased potting soil from the store.
These insects will make their homes in the soil, and that is also where they will lay their eggs. This can make things difficult for the plants.
There is always the option to go out and purchase some fresh, sterile potting mix each time you want to plant some seeds or propagate plants, but doing so can be a very pricey endeavor—the process of sterilizing the soil addresses this issue.
The primary objective of soil sterilization is to eliminate these pathogens, pests, and weeds while causing as little disruption to the potting soil or garden soil.
Pros & Cons Of Soil Sterilization
Sterilizing soil kills both good and bad bacteria, thus impacting healthy plant growth.

When it comes to consumers with fewer resources, such as homeowners, homesteaders, or people who are passionate about growing plants indoors, there is a wide range of viewpoints regarding whether or not the soil should be sterilized. Although there are many upsides to doing so, there are also some drawbacks to consider.
| Pros | Cons |
| Can prevent harm caused by pests and diseases.Cheaper than treating problems when they arise.Many techniques are harmless.Minimizes the risk of crop failure.Simple enough for the average person to attempt. | There is a chance that other plants will be affected.Some solutions take time and yield minor gains.Harmful to soil microbes and can kill them. |
Ways To Sterilize Your Soil
Chemical and heat treatments are the two common ways to sterilize garden soil.

There are many different ways to sterilize the soil, and the approach you select will be contingent on many factors. However, chemical and heat treatments are the two most common methods for disinfecting soil for gardening and indoor plant cultivation.
You should always use a technique you are familiar with and have the resources for. Also, remember that every approach to disinfecting soil has benefits and drawbacks.
For instance, you might try heating or chemically treating the soil if you only have a tiny amount. Solarization, however, is the best option for vast quantities of soil. Nevertheless, let’s go through each of these methods for sterilizing the soil one at a time:
Heat Treatments For Soil Sterilization
The use of heat, which may be accomplished using commonplace materials found around the home, is the most convenient approach for home gardeners to sterilize their soil. Heat treatments elevate the temperature of the soil to a point where weed seeds, harmful organisms, fungal spores, and so on are unable to survive and die.
However, keep in mind that if the substrate’s internal temperature is raised too high, heat treatments might be detrimental. Excessive soil heating can also lead to phytotoxicity from poisonous organic compounds, soluble salts, and manganese toxicity.
Some additional benefits and drawbacks of using heat to sterilize soil are as follows:
| Pros | Cons |
| Heat sterilization is advantageous because it does not involve the use of soil chemicals. Almost everything is killed by it. | Sterilizing with heat is laborious and time-consuming. Challenging, especially when there’s too much soil. Cannot be used to sterilize soil in an outdoor garden. |
Materials Needed For Heat Sterilization
Your list of supplies will seem slightly different from one method to the next, depending on which approach you choose to go with. In general, however, you probably already have each of these goods in your house somewhere.
- Ziplock bags.
- Pans for baking or any other heat-resistant containers.
- Aluminum foil or Plastic wrap.
- A thermometer with a reading range of more than 200 degrees Fahrenheit.
1. Sterilizing The Soil In A Microwave
If you have a tiny amount of soil, microwave sterilization works really well.
You might have heard that you can sanitize your kitchen sponge by heating it up in the microwave. However, you might not be aware that the same method works just as well on your soil. So if you are looking to sterilize just a tiny bit of soil for your small plant pot, you can put it in a microwave and sterilize it just like a sponge.
To sterilize soil in a microwave, you will need soil, water, a microwave, a heat-resistant thermometer, a plastic bag with a zip-top closure, and a plastic container.
However, this could result in an unpleasant stench, so make sure there is sufficient ventilation in the area. You might also think about temporarily relocating your microwave to the outdoors or your garage. Also, before you put the soil in the microwave, please give it a thorough inspection to make sure that it does not contain any metal particles.
However, in this method, unlike other heat sterilization procedures, you do not need to monitor the sterilized soil closely. And, this is the quickest method for sterilizing soil using heat. All you have to do is microwave the potting soil or potting mix.
Do not, however, cover your dirt bowl with aluminum foil. A step-by-step guide on how to sterilize your soil using a microwave is provided below:
Steps to follow:
- Put about two pounds worth of moist soil into a clean plastic zip-lock bag. However, ensure that the soil is not so saturated with water that it runs everywhere, nor should it be so dry that it crumbles apart when you squeeze a handful of it.
- If you are going to use a bag, you should put the bag in the microwave with the top half open so that there is enough room for air and ventilation. However, if you are going to use a box, you should first secure the container’s lid, then poke some holes in the lid for ventilation, and then put it in the microwave.
- Position the container in the microwave’s center. Then, place the bag or the box of soil in the microwave and cook it on high for approximately 90 to 150 seconds (or until the temperature of the soil reaches 180 to 200 degrees Fahrenheit).
- A meat thermometer can be used to monitor the temperature of the soil; once it reaches the target range, the soil should be removed. The time it takes to accomplish this will be determined by the strength of your microwave.
- You should take the soil out of the microwave very carefully and let it reach room temperature before using it. You are free to keep the lid on the container and store the soil for use at a later time as long as the bag remains tightly sealed.
It has been demonstrated that microwaves are capable of killing a wide variety of pathogens. So this is a great way to get sterilized soil for a tiny potting medium. However, gardeners who are working on more significant tasks do not typically turn to this method.
2. Sterilizing The Soil Using Steam
Soil can be easily and safely sterilized using steam as it kills germs without using harsh chemicals.

Many individuals sterilize their jars using steam. Steam, however, is not limited to sterilizing jars. Steam is so effective that not only can it clean your jars, but it can also sterilize your garden soil. Also, steaming is widely regarded as one of the most effective methods for sterilizing potting soil. This process must be carried out for a minimum of thirty minutes or until the temperature reaches one hundred eighty degrees Fahrenheit. (82 C.).
It’s very similar to making a steam pudding in the oven. You will need a large pot lined with aluminum foil, soil, the pot’s lid, a wire rack, containers that can withstand heat, and water in order to sterilize the soil using steam. Of course, a big tub of water would do the trick too.
However, similar to sterilizing using a microwave, steam sterilization takes a considerable amount of time and can only process a small quantity at a time. So, it is not suggested for use in the sterilization of significant quantities of soil.
Nevertheless, here is a step-by-step guide on how to steam sterilize your soil:
Steps to follow:
- In order to prepare your steam container, begin by adding an inch or two of water to the bottom of a non-pressure cooker. Next, insert a rack into the bottom of the container that will be used for sterilization.
- After that, place the dirt in the rack, and then cover the rack with aluminum foil. Next, put the containers that are filled with soil on a rack that is above the water and inside the pot. The top should be able to close correctly.
- Put the water through its paces by bringing it to a rolling boil. When the water starts boiling, keep it at a low simmer for the next half an hour.
- After thirty minutes of steaming, remove the steamer pot from the burner and set it on a heat-resistant mat so that it may cool down until the soil is ready for use.
- This will be sufficient to kill any pests present in the soil mixture. However, keep it covered with aluminum foil until it is time to use the sterilized soil.
3. Sterilizing The Soil Using A Pressure Cooker
The high pressure and temperature inside a pressure cooker are adequate to create sterilizing conditions.

The use of a pressure cooker is another way that can be used to sterilize soil using steam. However, just like sterilizing with a microwave or steam technique, pressure cooker sterilization can only handle tiny amounts of soil at a time. As a result, it is not suggested for use in the process of sterilizing significant quantities of soil.
You will need aluminum foil, heat-proof containers that are appropriate for your pressure cooker, and a pressure cooker with a rack, soil, and water to complete this task.
Also, when sterilizing nitrate-rich soil or manure with pressure, which has the potential to create an explosive mixture, you should always exercise extreme caution.
Furthermore, when using a pressure cooker, adhere to all of the safety warnings outlined by the manufacturer. To ensure that your soil is entirely sterile, here is a step-by-step guide:
Steps to follow:
- To begin, find a secure spot for your pressure cooker and place it there. Then along with the rack, put in a couple of cups of water.
- Place heat-resistant containers on the suspended rack above the water, and fill each container with no more than four inches of soil.
- Fill the containers with soil and cover the containers with aluminum foil.
- After placing the lid on the pressure cooker and following the instructions provided by the manufacturer, the appliance should begin to generate steam.
- If you are using a pressure cooker, you should shut the steam valve whenever you notice steam escaping. And to ensure that the soil is sterile, process it at a pressure of ten pounds for a period of time ranging from fifteen to thirty minutes.
- When you are ready to remove the soil and water from the pressure cooker, turn off the heat and give them some time to cool down. And maintain the sterile soil by keeping it covered with aluminum foil until it is time to use it.
4. Sterilizing The Soil With Solarization
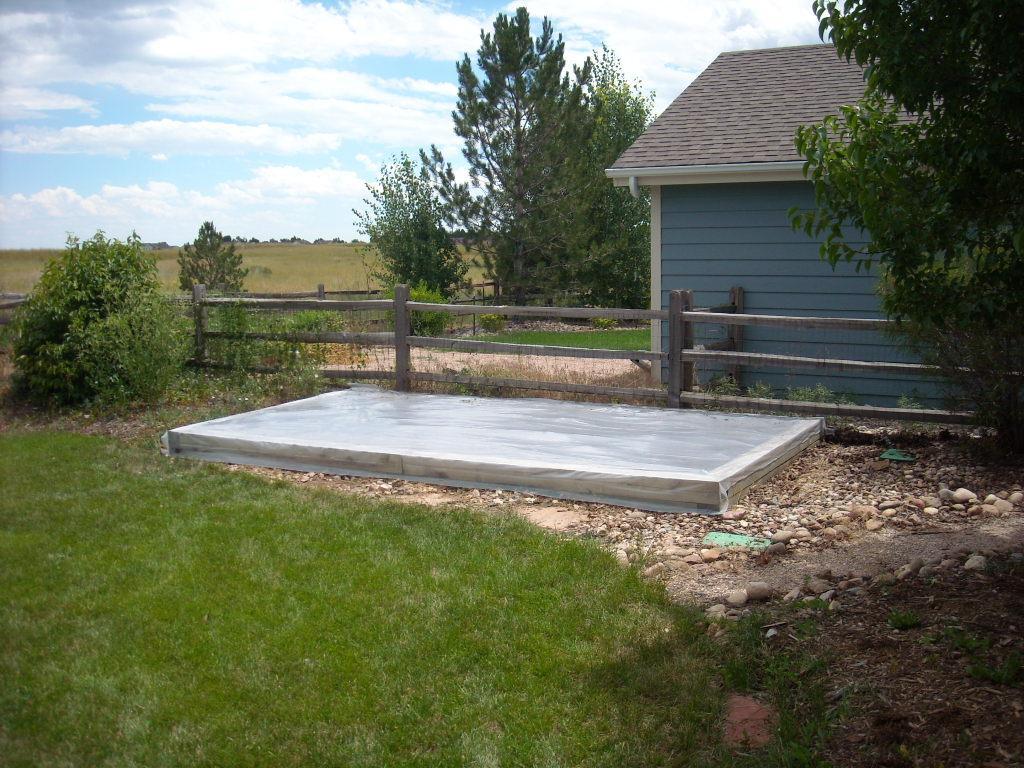
Solarizing is an organic strategy that can be used to control weeds and pests without chemicals.
You may have observed that the methods of heat sterilization discussed before are not ideal for sterilizing vast quantities of soil. Does this mean that you are forced to use chemicals?
Well, no! Exposure to the sun is a simple way to generate sterilizing heat for huge volumes of soil. Solarization is a standard method for sterilizing vast areas of soil, especially entire gardens or fields, and involves using the sun’s natural heat.
Solarization, as a method of sterilization, can take place in a few distinct ways depending on the circumstances. Take, for example:
Examples:
- The mineral or potting soil is divided into smaller volumes and then placed in plastic bags before being exposed to sunlight.
- Larger amounts of soilless potting mixtures are put between a bottom and a top layer of plastic to collect solar radiation.
- Large-scale gardens or fields may have plastic sheeting placed over them to collect the sun’s energy and sterilize the soil.
The end effect will be the same regardless of your approach. So, your decision should be based on factors such as personal taste and available funds.
In its most basic form, solarizing the soil is covering vast areas of ground with relatively thin layers of plastic in order to allow the soil to absorb the sun’s rays.
The objective is to get the same result as with the other approaches, which can be done by heating up your soil with transparent plastic tarps. Clear or translucent plastic is ideal for use since it will heat the quickest of all the plastics and allow the direct sun radiation to permeate the soil. A thinner plastic (one millimeter) provides better heating, but it is also more prone to tearing when subjected to the wind or animals.
As a result, I would suggest a sheet of excellent quality and medium thickness. Plastic with a thickness of 4 mils or greater should be used sparingly and in small areas only. However, solarization does not come without its drawbacks.
Solarization is a process that, on average, can take anywhere from two weeks all the way up to six weeks to finish. So, if you are short on time, this will not work.
Nevertheless, here is a guide on how to sterilize your soil with solarization:
Steps to follow:
- Find a spot in your garden that is exposed to direct sunlight for at least eight hours per day. In the event that you are sterilizing an outdoor garden, the garden itself would constitute your area for sterilization.
- If at all feasible, buy your plastic sheet in individual panels, and then locate some pegs or stones to use to hold the sheet and prevent it from blowing away.
- After that, water the substrate until it is just slightly wet throughout. It is recommended that garden soils be saturated to a depth of 24 centimeters.
- The quantity of garden soil you wish to use should have its clumps broken up, and any pebbles or plant matter should be removed.
- Plastic should be used to cover the prepared soil. Next, the plastic should be stretched securely across the top, and then rocks should be used to secure it.
- After solarization, which should take a few weeks. The solarization process will be completed in a shorter amount of time if the daily temperatures are higher.
Many beneficial soil organisms can either survive solarization or recolonize the soil relatively fast after it has been treated with solar radiation. This results in sterile soil swiftly recolonized with beneficial soil organisms after the sterilization process is complete.
5. Sterilizing The Soil In An Oven
Soil can also be pasteurized and sterilized by baking tiny quantities in an oven.

If you are only processing small quantities of soil, you may wish to choose to process it in the oven, where you can accommodate many containers or trays at once.
Be aware, however, that while the sterilization process is taking place, your kitchen will be full of a stench that some people might find offensive. You’ll need some aluminum foil, an oven-safe container, and a meat thermometer to sterilize the soil in the oven.
In addition, using your oven will take more time than using your microwave. However, your oven likely has a larger capacity than your microwave for soil sterilization.
Nevertheless, here is a guide on how to sterilize your soil in an oven:
Steps to follow:
- Turn the oven temperature up to 200 degrees F.
- Then, fill an oven-safe container with dirt up to about 3 inches deep.
- Soak the soil until a handful of soil can be rolled into a ball and held together.
- Keep the soil from drying out by covering the container with aluminum foil.
- Bake the dirt to soften it up. The ideal temperature for the soil is 180 F.
- The soil must be baked for another 30 minutes after reaching this temperature.
- Get the soil out of the oven. Allow the soil to cool to room temperature before use.
- Dollop on the cream… Just kidding.
6. Sterilizing The Soil With Fire
For medium amounts of soil, heating a metal container with fire from underneath works well.

During the growing season, you can save some money by removing soil from your backyard and utilizing it as potting soil instead of purchasing new soil. Some people even opt to burn enormous quantities of potting soil in a bonfire-style fire.
RELATED: How To Kill a Tree Stump For Good? A Comprehensive Guide
However, this strategy should be avoided for obvious reasons related to safety! Also, sterilize damp dirt, but not so wet that it won’t crumble if you try to crush a ball of soil in your hand.
It is also essential to keep in mind that because the soil has limited heat conductivity, fire may not be able to penetrate more than a couple of inches into the soil, which means that thick layers of soil will not be thoroughly sterilized. Nevertheless, to ensure that your soil is sterile, here is a step-by-step guide on how to use fire to sterilize your soil:
Steps to follow:
- Start this process on a dry day to maximize the fire’s heat.
- Add sawdust, compost, wood chips, etc., to a big container of moist soil.
- Start a fire in a fire pit with newspaper and matches.
- Spray water into the soil in a metal kettle that holds no more than four inches of dirt.
- Wrap aluminum foil around the kettle entrance.
- Hang the kettle on the fire spit.
- Use an oven thermometer to puncture the foil to check the soil temperature at 180°F.
- After 180°F, cook the soil for 30 minutes.
- After that, remove the soil kettle from the spit and let it cool.
Chemical Treatments For Soil Sterilization
Due to the high expense and potential dangers of the process, chemical sterilizing is normally only used by large commercial companies. The gas released by the chemicals travels into the soil and destroys the harmful entities that threaten plant health.
Chemical approaches are promoted as a low-cost and speedy solution; however, the reality is that there are more major issues that are harming commercial farms. For instance, although these chemicals were formulated to eliminate certain types of weeds and insects, they can also have a detrimental effect on the surrounding ecosystem.
To help you in deciding whether or not chemicals to sterilize soil is the best option for you, the following is a comparison of chemical sterilization’s advantages and disadvantages:
| Pros | Cons |
| Useful for large quantities of soil.In most cases, less effort is required. | In greenhouses, it can damage other plants.It won’t necessarily completely sterilize your soil. |
Some more drawbacks of chemical sterilization of the soil are as follows:
- In the long run, chemicals can make a disease or insect pest resistant to treatment, making it less effective or ineffective over time.
- Chemical residues in the soil may be taken up by plants’ roots and concentrated in plant tissues if not applied appropriately.
- Modern chemicals only produce effects within a narrow spectrum. For instance, one chemical usually kills one illness or bug.
Nevertheless, here are two common chemicals that people use for soil sterilization:
1. Sterilizing The Soil With Formalin
Formaldehyde is a cold sterilant that successfully kills all microorganisms, including spores and resistant viruses.

Due to its water applicability, formalin (a combination of formaldehyde and water) is frequently used to sterilize soil outdoors. It is an efficient method of sterilizing that can kill fungus as well as other soil pests. The best place to use this soil treatment, which involves fumigant the soil, is outside and on large batches of garden soil. The following is an in-depth guide that will walk you through the process of sterilizing your soil using formalin:
- First of all, formaldehyde should be diluted with water. The appropriate ratio is 1 part of 38% to 40% formaldehyde to 49 parts of water.
- Add this solution to the soil and let it soak. In most cases, the recommendation is five gallons of formalin for every square yard.
- To ensure that the soil is free of any harmful pathogens and ready for use, you will need to wait anywhere from 20 to 40 days.
- After this time, there should be no trace of the chemicals left in the soil, and it should be okay to incorporate them into your plant care routine.
2. Sterilizing The Soil With Hydrogen Peroxide
It has been proven that hydrogen peroxide is efficient against both active and dormant bacteria.

Hydrogen peroxide can be used to sterilize soil if a diluted solution is prepared and sprayed onto the ground. Since no special knowledge or skills are needed, this approach might also be great for novices. You can get hydrogen peroxide in a variety of different solutions.
The higher the concentration of hydrogen peroxide in a solution, the less amount of hydrogen peroxide you will need to make the sterilizing solution.
Nevertheless, to help you sterilize your soil, here is a detailed guide:
- Wear butyl rubber gloves for protection and work in an area with plenty of fresh air.
- Combine 2.5 cups hydrogen peroxide (3 percent) with 5 gallons of water.
- Soak the ground with the solution using a spray bottle.
- To avoid premature evaporation, do this in the late afternoon/early evening.
- It will have melted completely by morning, so just wait.
Some Extras!
You can save time and effort by buying sterilized potting soil rather than attempting to do so yourself.

Here are a few more things you should be aware of when sterilizing your soil:
Sterilizing Potting Soil
If you only need a small amount, such as one or two bags for your indoor plant, or if you want to germinate seed, it would be simpler, less expensive, and faster for you to just buy a bag of pre-sterilized potting soil. This would also allow you to get started on your project much sooner. Additionally, it is not necessary to sterilize newly acquired potting soil, particularly if the product is labeled as already having been sterilized.
Always Sterilize Soil Before Planting
It is inefficient and perhaps harmful to add a potted plant to a container that already contains soil that has been sterilized if the root ball of the plant is covered in unsterilized soil. As a result, always disinfect the soil before utilizing it in pots, gardens, and propagation stations.
This can also be helpful in situations where you simply want to reuse soil that has been used in the past or has a higher risk of being contaminated with weeds or pests.
When To Sterilize Your Soil?
If you’re starting seeds, sterilize the soil to ensure nothing can harm your plants.
Let’s speak about when you should sterilize your soil now that you’re familiar with all the different methods available to you for doing so. There are various situations in which soil sterilization is useful. For instance, when bringing indoor potted plants into your home, you need to ensure that you are not bringing fungi or bugs inside with you.
Or, in the case of starting seeds, using sterile soil can assist give them a better likelihood not only of sprouting but also in the early days of their life.
In addition, if you are beginning seeds and want to ensure that there is nothing in the soil that could negatively affect your plants, you can sterilize the soil using an appropriate method.
Final Thoughts
Even while sterilizing the soil might not be an entirely necessary action, doing so in some circumstances can be an excellent approach to give yourself the peace of mind that comes from knowing you have done everything in your power to save fragile plants or seedlings.
This is especially beneficial in circumstances in which soils are used multiple times to grow juvenile plants, propagate cuttings and germinate seeds. Your plants will appreciate you later when you’ve gained some experience sterilizing. However, whichever method you use to sterilize your soil, do your homework and be careful!
Frequently Asked Questions (FAQs)
Will boiling water sterilize soil?
Boiling water is an effective way to sterilize the soil. So, if you have any fungus or weed seeds in your soil, you may get rid of them by boiling water. However, only sterilize old potting soil using boiling water if it already has pest or disease problems.
Can you sterilize soil with hydrogen peroxide?
Hydrogen peroxide has several uses, including soil sterilization. It aerates the soil while killing bacteria and fungal problems like root rot. To do this, fill a watertight container halfway with soil, then soak the soil (or sand) in a mixture of hydrogen peroxide (3 to 6 percent).
Sources for Further Reading
Soil Steaming to Reduce the Incidence of Soil-borne Diseases, Weeds, and Insect Pests (Ramón Arancibia). (2022). Retrieved 4 November 2022, from https://ipm.missouri.edu/MPG/2020/11/steaming-RA/
How to Pasteurize Medium and Sterilize Containers and Tools. The Pennsylvania State University. Retrieved 4 November 2022, from https://extension.psu.edu/how-to-pasteurize-medium-and-sterilize-containers-and-tools
How to kill your soil | Center for Sustaining Agriculture and Natural Resources | Washington State University. (2022). Retrieved 4 November 2022, from https://csanr.wsu.edu/how-to-kill-your-soil/
We hope you learned something from this article, here are other articles that you can learn from:
Orange Mushrooms In The Yard? Here Is How To Get Rid Of Them For Good!
How Long Do Grass Seeds Stay Viable? Does It Expire Or Go Bad?
How To CORRECTLY Plant St. Augustine Grass Using Plugs? The Ultimate Guide
YouTube Video
3 Ways to Sterilize Soil for use Indoors

The majority of people who have no interest in the subject, and aren’t green fingered assume that all plants and vegetables require the same growing conditions. This is not the case at all. Each plant has its own unique and interesting history and growing process.
I hope you will find The Natural List useful, and that it will help educate you on the wide variety of different flower and plant species there are across the globe.
- Top 10 Online Places You Can Trust To Buy Indoor/Outdoor Plants - July 2, 2023
- How To Use Plant Watering Globes Correctly? A Comprehensive Guide - July 2, 2023
- 25 Fantastic Gifts For Gardeners And Plant Lovers - July 2, 2023
